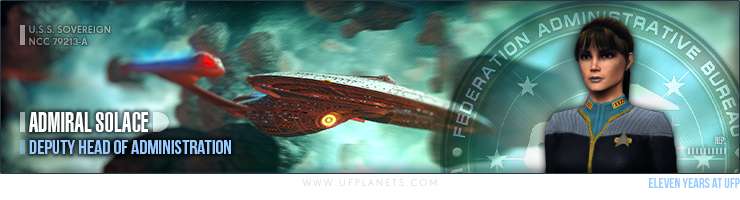
Admiral

Deputy Head of Administration
Commendation
Commendation (150 Points)
Awarded during the UFP Award Ceremony to those who go above and beyond for the community
Unlocked Sat 28 Mar, 2020 10:11 PM
0.24% have received this achievement
...and On and On
Very Rare (100 Points)
Reach five-thousand posts on the forums
Unlocked Fri 14 Feb, 2020 8:03 PM
0.08% have received this achievement
Pillar of the Community
Very Rare (100 Points)
Be a registered user for 10 years
Unlocked Thu 11 Aug, 2022 1:05 AM
34.52% have received this achievement
Editor-and-Chief
Rare (50 Points)
Be Federation News Service CO
Unlocked Fri 10 Feb, 2023 3:02 PM
0.08% have received this achievement
Admiral
Rare (50 Points)
Receive a promotion to the rank of Admiral
Unlocked Sat 24 Dec, 2022 10:13 PM
0.22% have received this achievement
Highly Decorated
Very Rare (100 Points)
Receive every medal the UFP has to offer
Unlocked Sat 26 Sep, 2020 10:02 PM
0.18% have received this achievement
Posted Mon 10 Aug, 2015 2:34 PM
–
Last edited by Bedders; Sun 01 Jul, 2018 7:45 AM.
 EX ASTRIS, SCIENTIA
FROM THE STARS, KNOWLEDGE
Using This Guide
EX ASTRIS, SCIENTIA
FROM THE STARS, KNOWLEDGE
Using This Guide
We enjoy the benefits of a very varied community, due to this there are only a few rules to follow when using TeamSpeak or STO channel, these follow the principles of the forum itself. Whilst the behaviour regulations on the UFP Teamspeak are more relaxed, it is still expected that members use common sense in accordance with these regulations. Please refer to the links below for more information.
For information on how to join our ingame chat channel for Star Trek Online. You can view the comprehensive guide HERE.
Commander Solace
Starfleet Operations Quartermaster
Teamspeak 3 Setup
The following is a comprehensive guide to setting up Teamspeak 3. This guide will include the following:
- Step by Step Install Guide
- Connection to ts.ufplanets.com Teamspeak server
- Configuring your Microphone
- Confirguring Push to talk
1) Download the Teamspeak 3 client which can be found HERE
2) Once the client is downloaded. Run the installer.
3) The following window should pop up

4) Click the 'Next >' button located at the bottom right of pop-up to proceed with the installation.
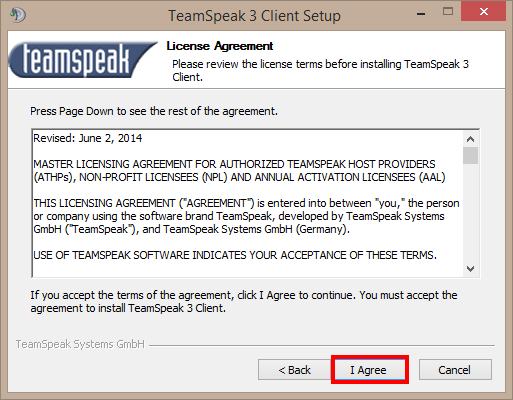
5) After reviewing the EUA click the 'I Agree' button located next to '< Back' at the bottom right of the pop-up to proceed with the installation.
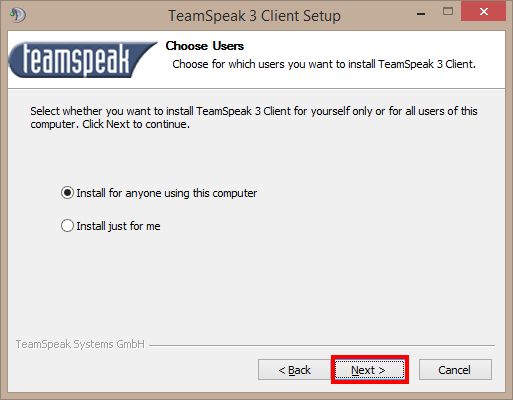
6) On the next window you can choose to install for every account on your computer or just your account. Whichever is your preference. Once your option selected, continue the installation by click the 'Next >' button at the bottom right corner of the pop-up to proceed with the installation.
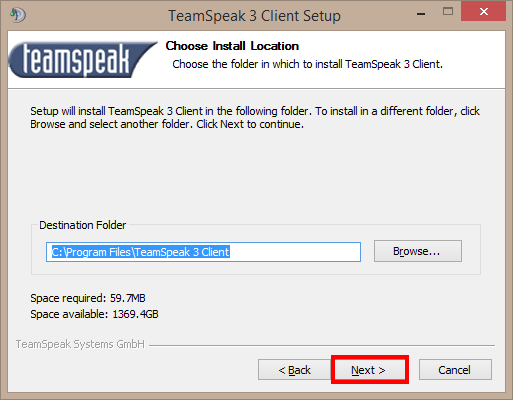
7) On the next window, you can choose where you wish to install the client or you can let the setup wizard install Teamspeak to the default location in Once you chosen the destination folder 'Next >' button at the bottom right corner of the pop-up to proceed with the installation.

8.) On the next window, you can choose whether to save the teamspeak configuration settings to its recommended location or to install it into the install folder of the client. For our purpose stick to the recommendation and click 'Next >' to proceed with the installation.
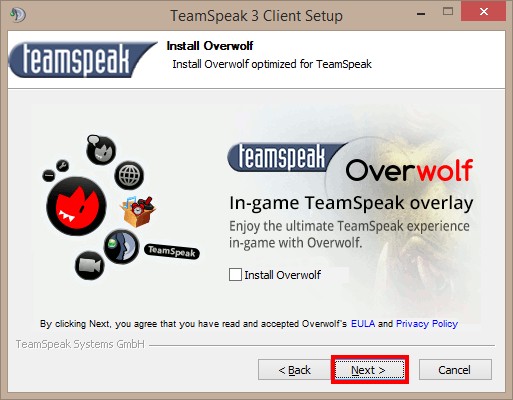
9) On the next window, you can choose whether or not to install Overwolf. Overwolf adds an ingame overlay into PC games as well as handy other features. Notably, this will allow you to overlay your teamspeak 3 client (when open) and see what is talking and see text messages without tabbing of your game. You will need to check the box if you wish to install it. After you made your choice, click the 'Next >' button at the bottom right corner of the window to proceed with the installation.
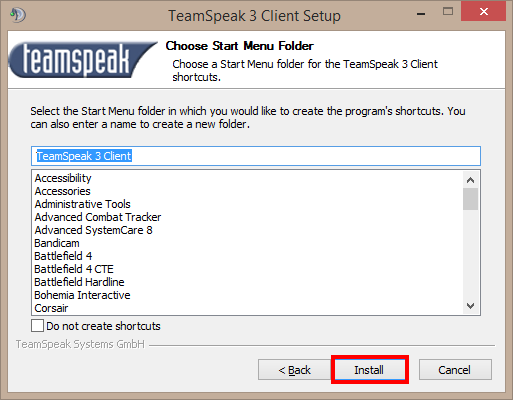
10) On the next window, you can choose to install teamspeak 3 to a custom start menu folder. We recommend leaving this to defaults. Click the 'Install' button at the bottom right corner of the window to proceed with the will install.
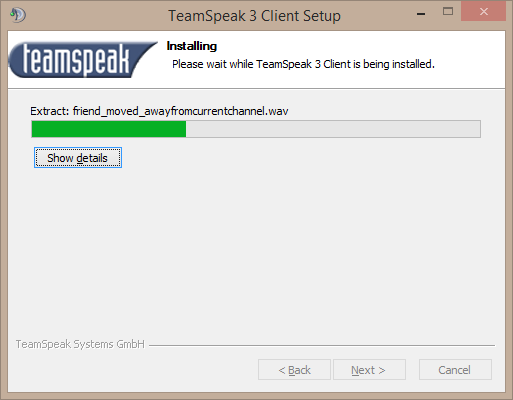
11) On the following window you will see the installation progress bar. The client is installing!
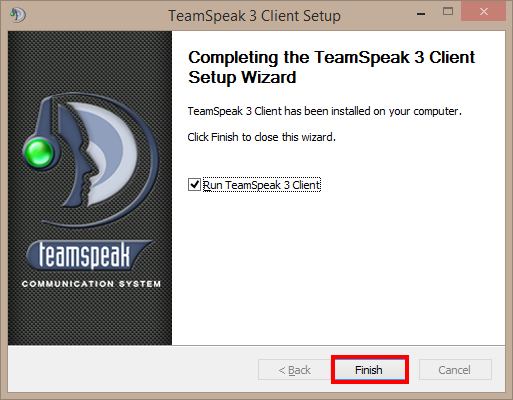
12) Once the installation is complete you will see this window! You can click the 'Finish' at the bottom right corner of the window to complete finalize the installation.
Connecting to the UFP Teamspeak server
This short guide will show you how to connect to the UFP's teamspeak 3 server
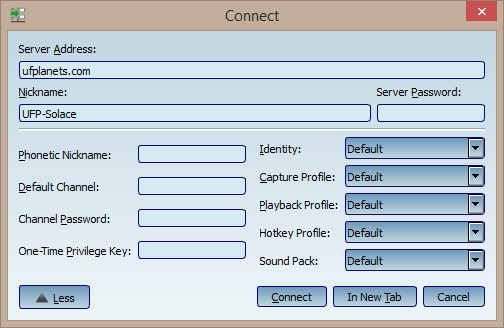
Teamspeak 3 address: ---------------------> ts.ufplanets.com
1) Run Teamspeak 3 client
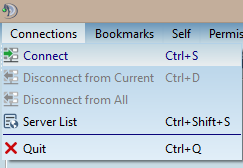
2) Click 'Connections' in the top left hand corner of the screen, then click 'Connect'
3) The following window will open, simply type 'ts.ufplanets.com' in the 'Server Address' bar and click 'Connect'. You can give yourself a nickname in the box below 'Server Address'. I have chosen 'UFP-Solace' as that is my username on the forums.
Section 2: Configuring your Microphone and Push to Talk
This section of the guide will show you how to configuring your microphone settings and push to talk in the teamspeak 3 client.
1) Run Teamspeak 3
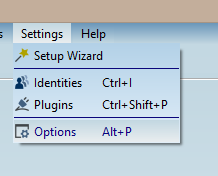
2) On the top bar (where we found 'Connections' in the previous guide) you'll notice on the far right 'Settings' click that.
3) The following window will popup. On the left hand side click the tab called "Playback" here we will configure your headset so you can hear everyone!
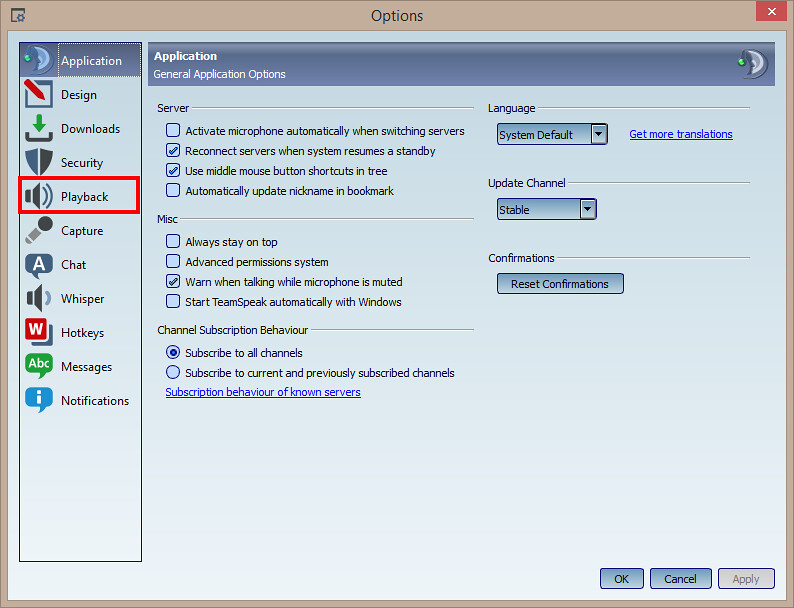
4) This will open up the "Playback" tab. Here you can configuring your playback settings. I'd recommend leaving 'Playback mode' as 'Automatically use best mode'.
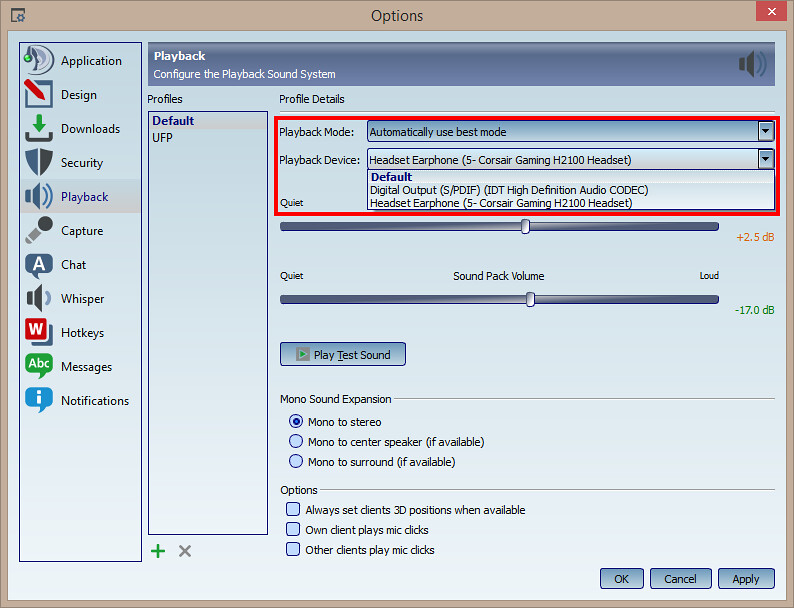
5) Underneath 'Playback mode' you'll notice 'Playback device' here you can choose which headset you want to use (If you use multiple devices) If you have just the one headset leave this 'Default' and Teamspeak will use the default playback device as specified by Windows settings.
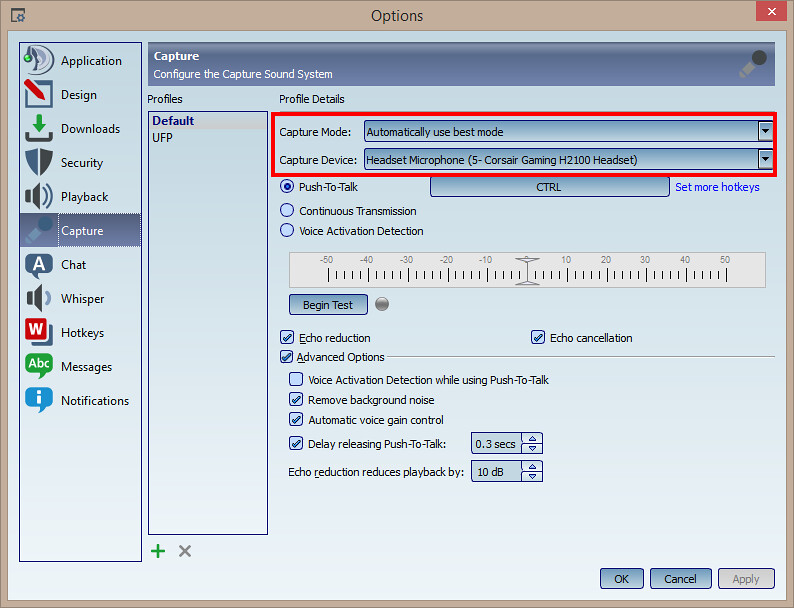
6) On the left hand side of the tab underneath 'Playback' you'll see another tab called 'Capture'. Here you can choose which headset you want to use (If you use multiple devices) If you have just the one headset leave this 'Default' and Teamspeak will use the default playback device as specified by Windows settings.
7) Now we're going to configure your push to talk 'Hotkey' (The key you push when you want to transmit voice audio or talk in channel) this is preferred on the UFP teamspeak so unwarranted noises such as vacuums, shouting leaks into the channel drowning our conversations or upsetting other users.
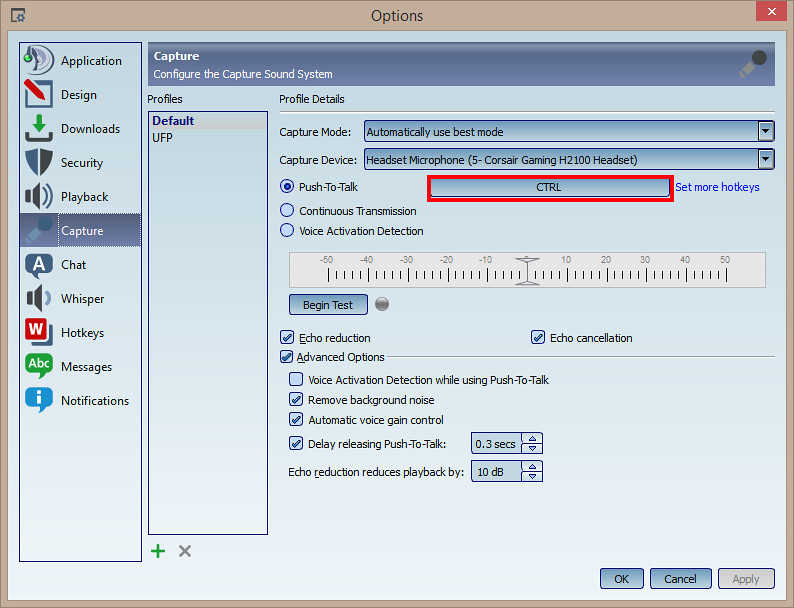
8.) To select a push to talk hotkey, undernearth 'Capture Device' click the first option 'Push to Talk' and then the box to the right (highlighted in red) and click it. Simply press any button on your keyboard or mouse and that button will be assigned to push to talk.
This means that in order to talk in channel you must be holding this hotkey for example I chose 'Control' or 'CTRL' as my push to talk button. This means that in order to talk in channel I must be holding down control to talk.
Congratulations! You have successfully configured your Teamspeak 3 client
I hope you found this guide useful.
Credits
Version 1.0 by Commodore NeoTrident
Version 1.3 By Commander Solace
Additional:
Commodre Mazoue
Radm Silynn
Vice Admiral KerryMalone
Captain Zach